It’s always something, even on the simplest of jobs.
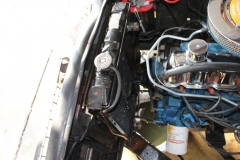
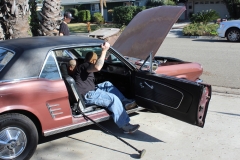
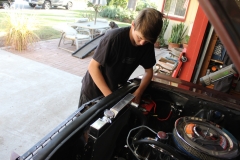
With all projects in the garage, we first discover a need. Like: Why do we need a new radiator? For this reason we go back a week or so. Marcus came over to the house to get some help installing a Borgeson Power Steering kit in his Mustang. At the end of a long day, which you can read about later, we get it all buttoned up and I take notice: DANG! That fan sure is close… As Marcus spins the key, I’m looking at the motor and whir! Crash! And SHOWER. He cuts off the motor and sure enough the, bottom right side of the radiator gets thrashed by the fan. DAMN! These old radiators are spot welded to the brackets. Apparently when we re-installed the radiator, we didn’t take notice that the bottom right corner was broken loose from it’s weld and was sticking out toward the motor.
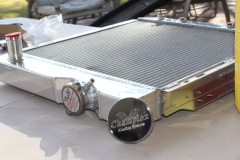
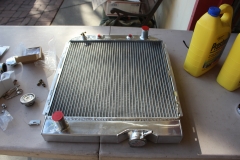
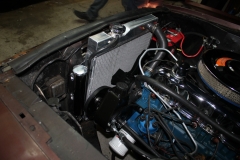
Defeated for the day (into the evening really) we push the car to the bottom of the driveway and start cleaning up from our day in the garage. Here’s another time Marcus has to leave his car, to work on it at another time. I talk to some of my buddies in the Mercifuls Car Club and I keep hearing about Champion Radiators. At Cambra Speed Shop, they are using Champion Radiators. Then I remember my friend Michael recently became the Director of Marketing at Champion Cooling Systems. You may remember Michael when we were re-wiring the ’56, Project Riff-Raff. He wrote up an article for Street Muscle Magazine installing the same kit on his ’65 Belvedere II. So I call up Michael and told us they have a 2-row aluminum radiator with welded tanks and brackets, no epoxy on these guys. We order it and get it right over for next weekend’s “Christmas Eve Wrench Fest”.
The radiator came protected in a nice thick box. We opted for a polished remote reservoir or “Puke Tank” which came with the brackets and all the hardware. We stopped at the local auto parts store to get a pair of hoses as well. Best to get all that stuff now before we have a blown hose and make a mess of it.
HERE’S A TIP. Cut the cardboard box sides and tape them to the radiator front and back to keep the fins protected when you install it. We bent a couple of the fragile fins just by handling it and slipping it in the core support. Then remove it when you are all done.
We cleaned up the original four bolts that hold the radiator in the core support and removed the internal trans cooler fittings. They bolted right in the same place on the Champion Cooling Radiator. A little bit of Teflon tape and they sealed up real nice. Carefully we slid the radiator down being careful not to hit the fan. This is where the tip about using the cardboard would have been neat. I can imagine a diagram with the silhouette of the radiator to cut out. Cut it out, tape it up with some blue painters tape, install the radiator and remove the cardboard and tape. Man, that’s genius!
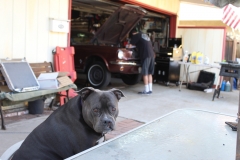
Hilda watched our backs as we worked in the garage all day. Occasionally she would come over and offer some advice with a bark and sniff.
We had marked where we wanted to install the puke tank with a silver sharpie on the side of the core support. Someone with a bit more experience would have at least mounted the brackets there before the radiator. A seasoned vet would mount the entire puke tank in before the radiator. It would have been much easier accessing the stainless steel brackets and bolts with the radiator out. I tried a trick using a telescoping magnet to hold the nut, but of course it’s stainless steel and not stickin’ to the magnet. With a bit more effort the puke tank was installed and ready for some plumbing. So just like that it’s all installed and ready to add fluid.
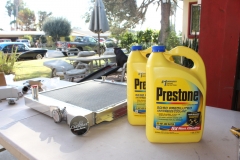
Prestone is celebrating their 90th anniversary of making coolant and have released a new formula with Cor-Guard. You can get it pre-mixed 50/50 with distilled water, or full strength. As Michael would say, you’d save yourself a few bucks if you buy one gallon of full strength and a gallon of distilled water. We used the pre-mixed.
It’s Always Something…
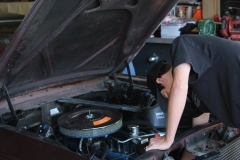
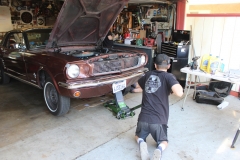
This is where the high of working all afternoon goes south real fast. While we are filling the radiator, we notice a nuclear green puddle forming under the car. Marcus gets under it in a flash and says it’s coming from behind the crank pulley. A small leak coming from the water pump is the culprit. We run to the local parts store and get a new one just before they closed on Christmas Eve.
Marcus and his family were coming over for Christmas, so after we had our ham, in the garage the guys went and started removing the old water pump. That damn thing looked like it was on the Titanic. We grabbed a thermostat, but they didn’t have a new water-neck, so that will have to be another time.
Just goes to show ya. It’s always something when working in the garage. It happens to all of us, shank a knuckle, or bust a wrench. One thing is for sure. Those are the teachable moments. And to have a kid in the garage, learning those. I feel very fortunate and grateful when Marcus compares the sense of achievement he gets when working on his car.
Share your story with the #KidWrencher tag.

