
Installing a Hellwig EZ-990 Load Spring
Story/Photos: T-bone See the video on BlacktopTV
Billy and I decided to take the Blacktop Baller shop truck over to guest garage, The 401k Club Hot Rod Shop to install a Hellwig EZ-990 Load Helper Spring. The Load Control spring will help keep the truck level with loads or pulling a trailer. With your front end not pointing up in the air you have better control and safety. We loaded up the parts, tools and headed on out to Anaheim.


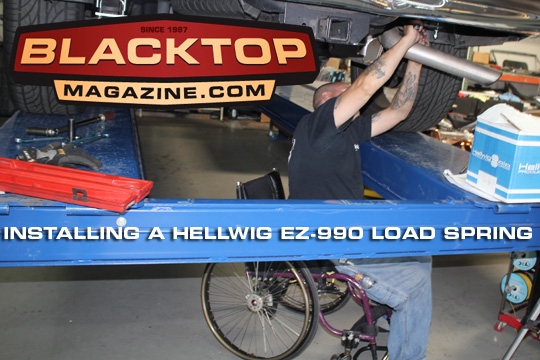
We met with Dana and Shop Foreman Jim and they instructed us right up on their new BENDPAK 4-Post lift. We raised it up just enough so Billy can roll in his chair and install the springs. I was there to be his tool-monkey as usual and offer a second hand when needed.
Hellwig provides all the necessary hardware and instructions and looks like a pretty simple job. After a quick review of the instructions we got busy.
First step is to lay the spring on top of the stock leaf pack with the longer arm to the rear. As you can see the springs have a step to fit over the stock leaf bracketry. We took the two shorter U-bolts and loosely installed those on both sides of the step. The longer U-bolts are then laid in the cups at the ends of the spring. We added the bridge brackets and loosely tightened a nut on each end. From there we could see if there was a good placement of the spring. Take note that if you have the plastic clips holding spring pads like we did the RAM 1500 you may need to shear them off to fit the spring properly. We did that so the bridge wasn’t on the edge of the 2nd spring in the stock spring pack. No real harm since those clips are there for the installation of the springs not in the everyday working of the suspension.
We tightened the inside shoulder U-bolts to 50lbs on the torque wrench and added the supplied jam nut. On the outside cups you can adjust the spring to your choice of pre-load. We chose to tighten it down to full pre-load which makes a nice solid ride. This way when we load the truck with our bikes or projects and add a trailer, we won’t need to get under and tighten up the springs.
Now on to the passenger side. Here we did the same process, but there were a couple of minor issues. On our RAM Truck the parking brake line was right in the way of the front inner bracket making it a bit tight to adjust the nuts. On the far back bracket the exhaust tip was right in the way. It works fine just a bit more work with hand tools.
That took us a bit over one hour, mostly because of the hand tools involved. Now it’s time to test it out over some bumps and inspect to make sure everything is where it’s supposed to be. Which is fine, because we have to roll out to Torrance for a private tour of the Edelbrock Facility. But that’s another story.
On the road we noticed a bit stiffer ride, especially over some strategic pot-holes and hard launches on the green light. A little over 40 miles, we arrived at the Edelbrock HQ and inspected the brackets. All were in good shape. The true test is the next time we load the truck up with parts or bikes. Hellwig has recently launched a series of products for muscle cars and pro-touring machines. Check it out at www.HellwigProducts.com. Oh, and tell them Blacktop sent you.
Epilogue: You may notice a Hellwig Air box in the pics. We will be testing their Air Spring Load Control Kit too. Watch for that soon. So far we dig the sway bar and EZ-990, the air spring is sure to be a hit.