
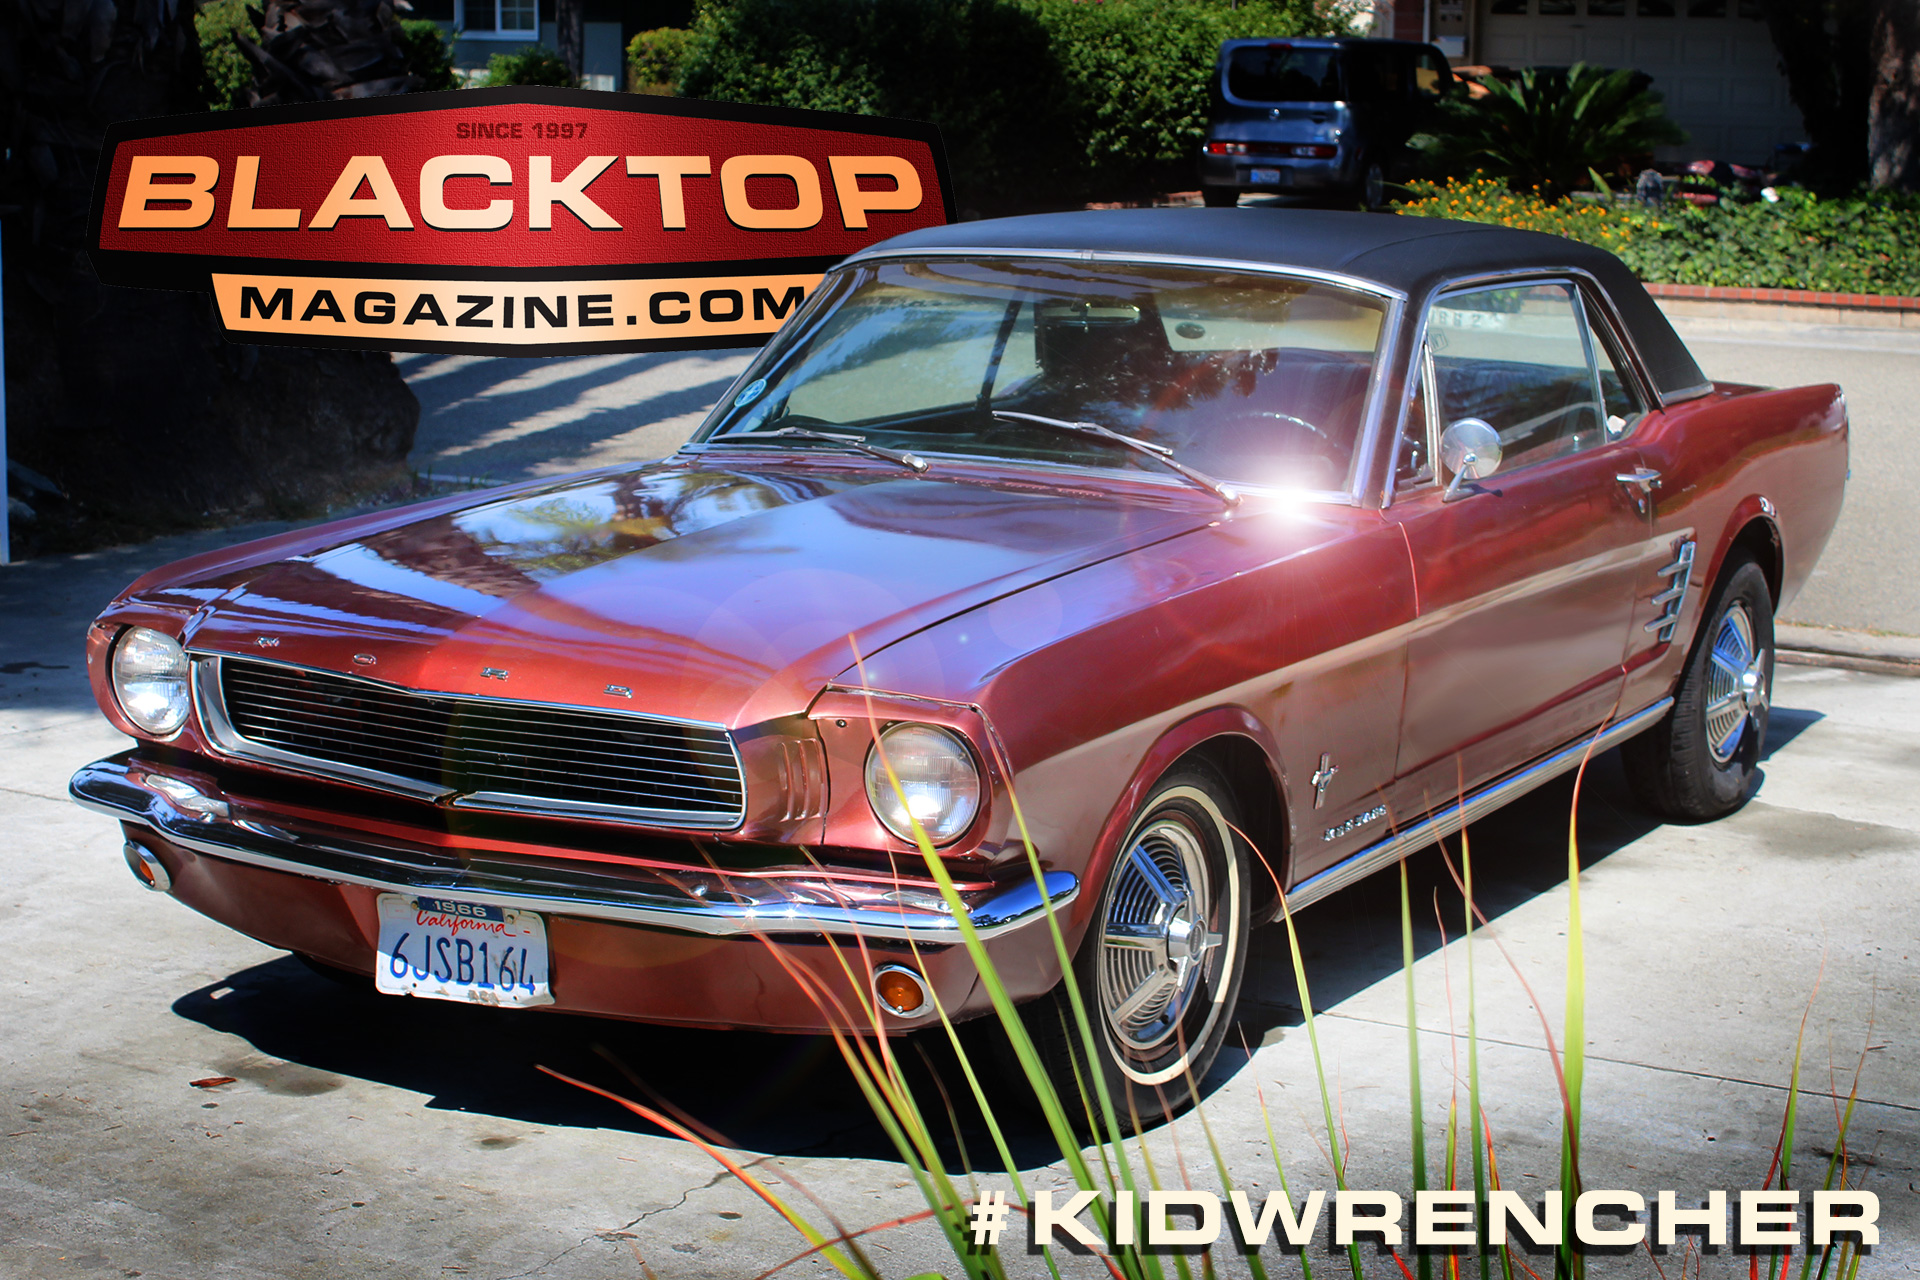
I gotta hand it to my nephew Marcus. He doesn’t mind just diggin in and gettin’ all greasy. Something of a rare trait for a 16 year old suburban kid. He grew up in a three generation house hold and focused a lot of his efforts on Baseball, from T-Ball up to High School and apparently doing well in school too. OK, enough of the proud Uncle talk. Let’s get to what we are here for: To share the story of how Marcus while working on his ’66 Mustang, fought through the challenges, and the feeling of pride on doing something he has never done before. Heck, something his father Tim and me his uncle has never done either. It was a great learning experience for all of us.
It all started when Marcus said he wanted to upgrade the car to 5-lug and prep it so that some day he would swap the inline 6 to a V-8. I asked him what he would eventually want to do with the car. What style? He pointed to the Ken Block Hoonigan video Gymkhana Seven; Wild in the streets of Los Angeles. This is going to take a much bigger budget and much more expertise than we can give him. An 845 horsepower all wheel drive 1965 Ford Mustang.
Back to reality… I spread the word that we were looking for an 8″ rear end with 5×4.5 lug pattern. Richard Graves from Richards Wheel and Chassis in Long Beach, a good friend and long time Early Times CC member, ordered us just the thing with 3.50 gears with new brakes as well. We scooped up the deal and got busy working our schedules. Finally a Saturday was open to get busy.
We didn’t get started on it till about 10:30am and dug out the old rear end first. We only needed to remove the u-bolts for the u-joint holding the drive shaft to the third member. Then we released the bottom of the shock from the shock plate under the leaf springs. The shock plate also holds the rear end in place with a pair of U-bolts wrapping around the axle housing and past the leaf springs. Disconnect the brake lines and we are free to go. We get the grimey mess up on the tailgate of the Blacktop Bruiser and study it in the light of day.
We then take the new 8 inch which had the brakes in a box. The third member was separate. We bolt up the third member with the supplied gasket, and tightened to specs we found online. I was in a hurry to put it under the car so we can see if there is a difference in drive shaft length. We set up the axle spring pads on top of the leaf springs with the knub fitting in the center hole of the pad.
Challenge Number 1.
The stock spring plates are too small for the larger U-Bolts to fit properly. We call up Mustangs and Fast Fords in Santa Ana, CA. Tim and Billy head over to get the parts. The time lost can be put to good use. Marcus and I had a chance to reflect a bit about what we are doing while scraping 50 years worth of grime off the stock rear end. I told him we clean up the old parts, because we are going to be moving them around, from the side yard, to his house, to the swap meet, etc. So why keep getting dirty when ever we are going to move it. A putty knife and some degreaser and we got it pretty cleaned up. Billy and Tim arrive with exactly the same part as original, but new. Too late in the afternoon to go back, so we turn the plates 90° and install the axle housing with only one U-Bolt on each side. This way we can still move the car around. Basically, so I can park my car in the garage.
We keep working because we need to get the wheels on as well.


Challenge Number 2.
We were at a miss on trying to figure out how the axle seals go in. Does the flat side go out or in? I texted a couple of buddies in the Mercifuls car club and Jeff Allen got back with the flat side out. Make sense, just wanted to be sure. Remember, neither one of the three of us knuckleheads have ever done anything like this before. We set in the bearings and pushed them in to the race on the inside of the axle tube. Slide in the axle on each side. I got to say they went in easier than I thought. I assumed we’d have to twist it in to find the gear, but they just slid right in.
No problem bolting in the back plate and then Tim got busy installing the brakes. He was a bit of a bear grunting in the parking brake cables.
As Tim was finishing up the brakes, Marcus and I record a little video about the work we did:
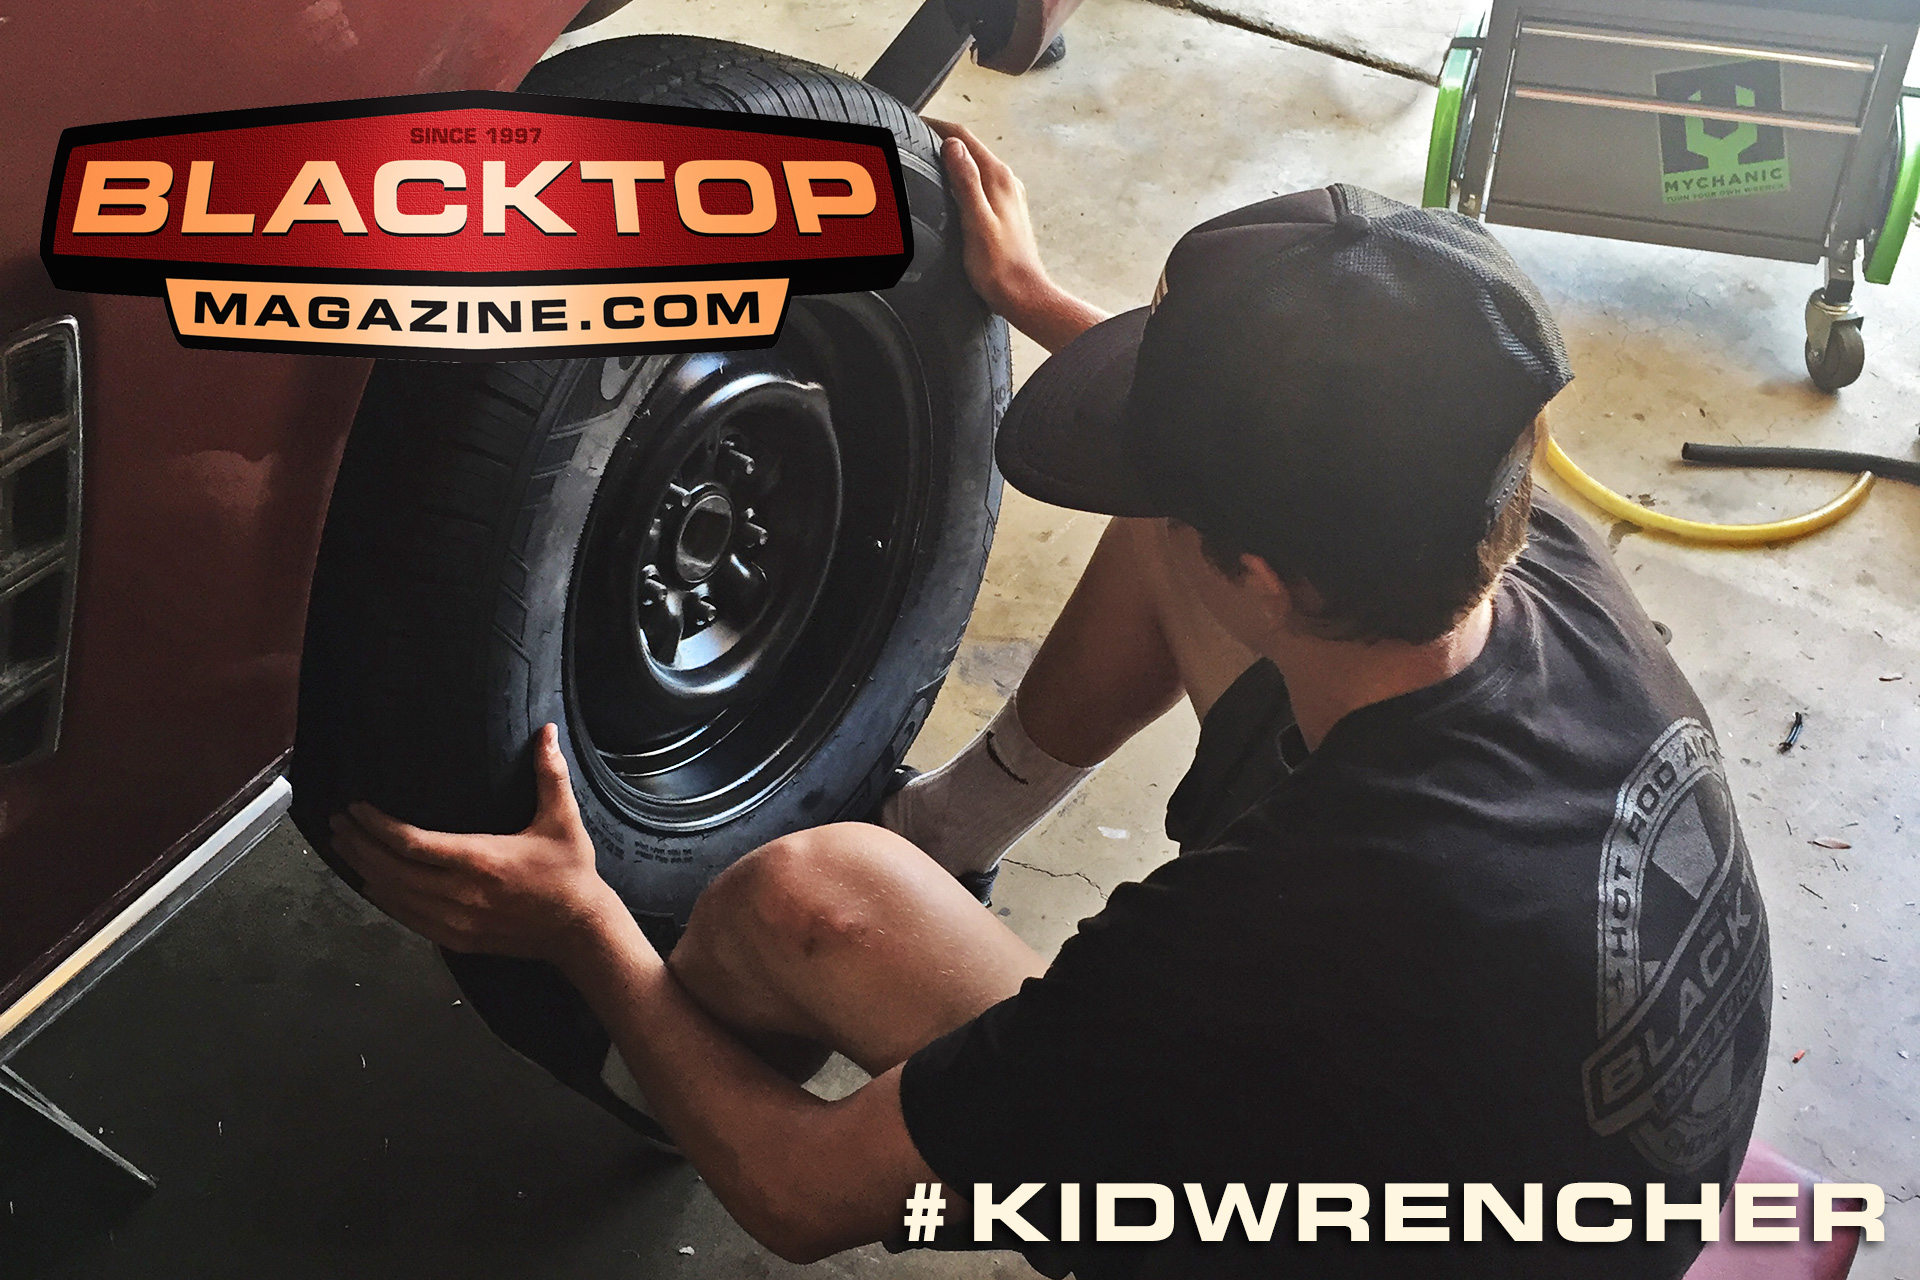
After the brakes were done it wasn’t much to bolt up the wheels. Marcus had sandblasted the wheels in the blast cabinet at Cambra Speed Shop the other day. They picked up some rubber earlier this morning and we painted the wheels with cheap rattlecan black. They will be replaces as soon as I get a new set of wheels and tires for the ’56. Looking at set of polished Rocket Strikes with wide whites. (wink, wink, nudge, nudge). We push the car to a corner of the drive way and button it up till we can work on it again.
Two Weeks Later…
Knowing we would need an entire day devoted to finishing this up it took a bit to line up our schedules. During the past couple of weeks, Marcus picked up the right spring perches and a new set of U-bolts as well. He grabbed a longer flexible brake line that connects from the frame to the rear end, with a T at the end and a bracket that attaches at the breather. The one that came with the rear end was about 2 inches too short. I could just picture the kid with a couple of buddies in the trunk heading out to the Drive-In on a Friday night and extend the shocks to far that the brake line breaks. That single pot master cylinder would lose all the brakes in the car. Add that to the list. Dual master cylinder and front disc brakes.
Marcus and his dad got busy with the U-bolts and spring plates. Next we tighten the U-bolts holding the driveshaft to the universal joint in front of the third member. Now it’s on to the brake lines. The new flexible line fit up perfect. The new hard lines were a perfect length on the long side, but the short side was too long. A couple of S curves and we fit it right in. Otherwise it was another trip to the auto parts store and NOBODY wants to do that…


With the rear end all snug. The brake lines tight, it was time to fill up the rear end with gear oil, and bleed out the brakes. At this time Marcus’ grandpa came over and he helped by pumping the brake pedal. A nice experience to have three generations in the garage working on the car together. Sooner than nothing, they had the brakes bled and we were ready to test drive it.
 I jump in to roll with Marcus. We went around our neighborhood and listened for any odd whines, creaks or grinds. The car ran real smooth and when we got back we checked for leaks. Not a one. DAMN! You’d think we were professionals or something. They washed the car and I followed them out of the neighborhood. The rear sits with a bit wider wheelbase than the front, nothing to be concerned about.
We’d like to hear YOUR STORY. Tell us about you working with kids in the garage. Lets share with #KidWrencher on Facebook and InstaGram.