
Say that three times fast…
Photos/Video/Story: T-Bone
You may recall when Billy and I were at the SEMA Show we saw some really cool products. One of them we mentioned in a previous article was the AeroBox from the family at Ecoological. The AeroBox is one of several items they have for truck owners. Basically it is a rear mounted cargo box, but there is much more to it as you will see here.
The Features:
AeroBox comes in two versions. The Standard version which mounts with quarter turn fasteners to the floor of your truck, and the Premium version includes “Dock-n-Lock” side panels, tie down hooks and internal divider panels. The side panels have a storage shelf on one side and a lockable compartment on the other side to use when the AeroBox is removed. The AeroBox is portable with its handy wheels, you can roll it away easily. We plan to fill it with parts, for the B.A.D. Bike Build, fill it with picnic gear when hanging out at the park, and even the weekly groceries. It’s like having a trunk on your truck.


The Installation:
Installing the box is fairly simple. In-fact, I think it’s easier to install than to say the title of this feature three times fast.
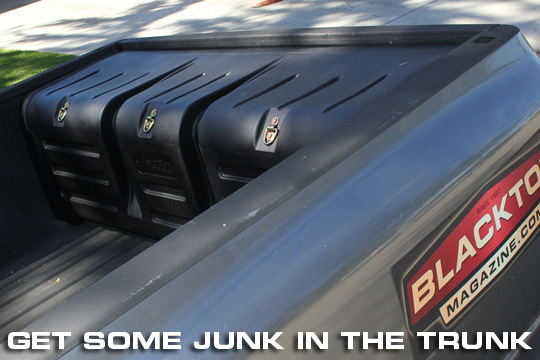
We installed the Premium AeroBox on T-Bone’s Blacktop Bruiser, a 2005 RAM 1500 Hemi standard cab, short bed. The instructions suggest it will take close to two hours to install. We took our time to shoot some photos and make careful measurements. The instructions also have a list of all the tools you will need. One of them, a 17/32” drill bit is quite a unique size used for the riv-nut included in the kit. We followed the instructions and took a ½ inch bit and “reamed” the hole a bit larger, testing the riv-nut till it fit snugly, using a bead hammer to drive it home. We opted to head over to Hillco Fastener Warehouse for more riv-nuts since we prefer that to having to reach up through our bed side-panels to tighten the supplied nyloc nuts. For our installation we are also using a couple of unique tools we found at the SEMA Show. To mark the holes in the bed, we are using a Spring-Tools center punch. It’s a handy spring actuated punch. We are also using the Veloci-Drive ratchet from Grip-Tite. The Veloci-Drive actually continues to drive the fastener when your are “back-peddling” the socket wrench. Amazing technology.
Back at the installation; we followed the instructions fairly well. First adding the features to the box itself: Tie down hooks, wheels, and rubber feet. Then we proceeded to add the side-panels. With the box in place, simply slide the panels in position, mark the bed at the bottom front of the panels and then we stuck the white crayon pencil through the slotted holes to mark the inside of the bed. A pull on the trusty Spring Tool Punch and that marks the pilot holes and then the larger holes for the riv-nuts. It’s a slam-dunk from here. Add your 4.5” threaded logs, use the nuts and washers to line up the top and bottoms to fit the box in tight with a Veloci-Drive wrench, and you are done. Oh, one more thing. Drill a hole on the sides of the box at the designated mark to put the quarter turn fasteners through to lock the box to the side panels. With the box hooked into the sides, and the box locked, you have a secure storage area that is easy to access in your truck.
Here it is. Another great product, BUILT IN THE USA, packed full of cool features and affordable too. Check this out and their other “cool” products at www.eCOOLogical.com