
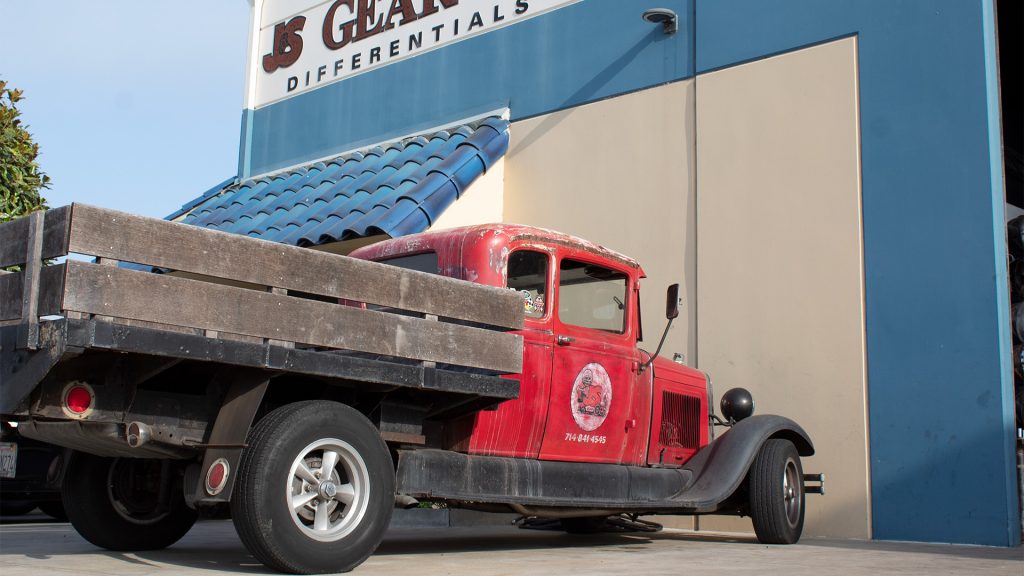
Installing the Differential and Gears at J & S Gear Company.
This has been an interesting project. The closest I have ever done of something like this is when we replaced the rear end on my nephew Marcus’ #KidWrencher ’66 Mustang. Good thing I have some friends to call on. Gordon McIlonie, President of my car club; Mercifuls, came over to help remove the rear end. Gordon has worked with Transmissions and Rear Ends most of his wrenching life. He offered to rebuild it for us, but I have heard so much about John over at J&S Gear Company in Huntington Beach, I thought I’d take it there and give our buddy a break.
I dropped it off at J&S Gear Company in the morning with the new Eaton Detroit TrueTrac and John said to give him a couple of days, he will tear it down and clean it up for us to come in and record the process.
It was another cool morning and John was finishing up getting the parts and tools together for the installation. He said the pinion gear originally had a solid spacer, so we will be using a solid spacer and solid shims to get the alignment just right. more on that later.
This is a really cool shop, neat where it needs to be and has a definite old-school vibe. There is memorabilia hanging around if not an old gas pump from the ’50’s to a full size wood and neon Seeburg Jukebox. After the installation John was telling me about a car club he belonged to once where they were able to get enough funds together to get some property from the city and a club house with all the cool accoutrements. Coming here is very much a lot like visiting an artists’ studio. Instead of paints, brushes and canvas, there’s wrenches, oil and steel.
All the while John is building up the gear set, the other guys in the shop were getting stuff done. It was a buzz like a band each playing their part and the shop as a whole is rockin’.
So, let’s get to it.
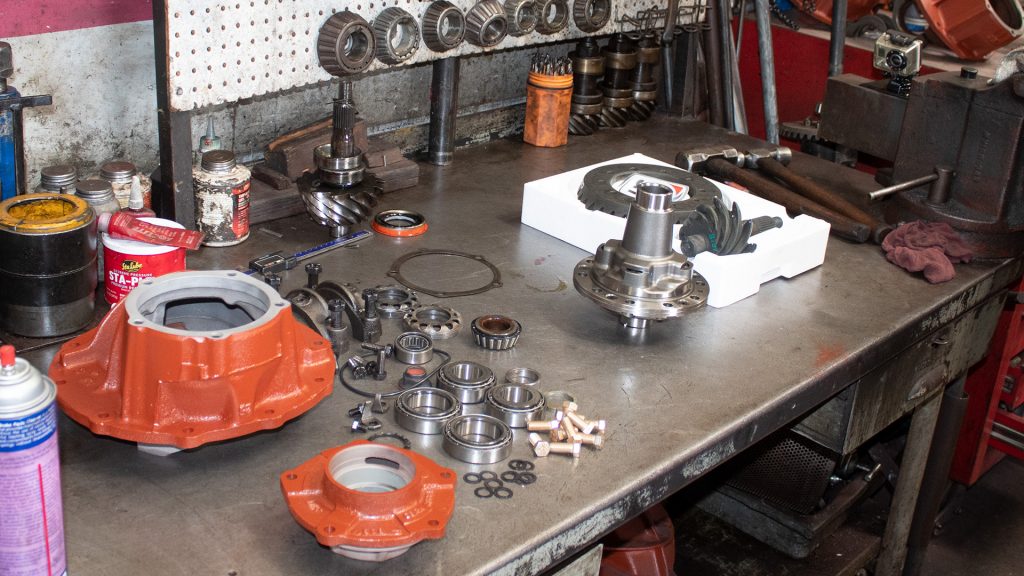
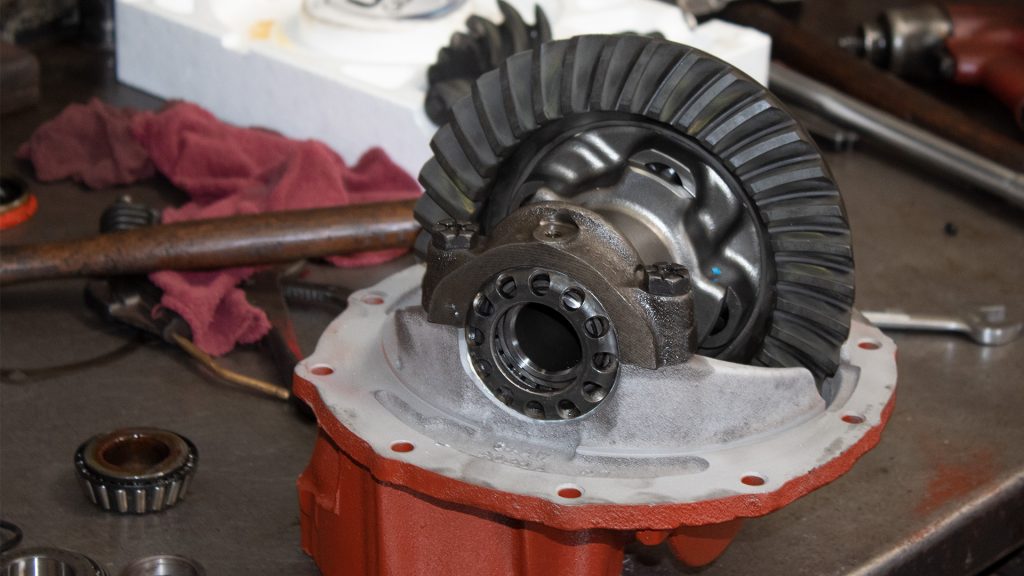
In an instant, John had all the parts and tools on the bench and ready to assemble this pig. Freshly painted housings, clean parts and a brand new set of 3.50:1 (“350’s”) from U.S. Gear. This is one thing that has changed since part one. John really likes using U.S. Gear, they are super strong, reliable and don’t whine like some other brands. I always say, go with what the experts who do it everyday use.
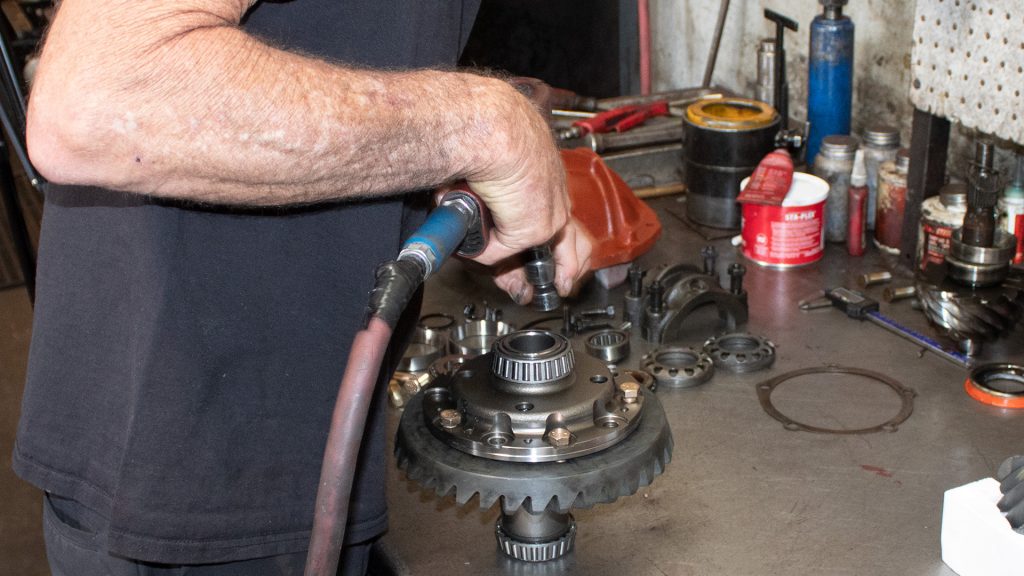
First step, install the ring gear onto the TrueTrac differential. This should have a good stiff fit. He used a set of 5 bolts to bring the gear up to the mounting plate of the diff. If the gear slides right on, then it is too loose and will only be holding on by the bolts. As tight as it is, nearly needing a press, the entire surface of the inside diameter of the ring gear is stiff with the differential. A drop of thread lock on each of the 10 bolts and the ring gear is torqued to 65#.
This reminds me of something that Robert Florine from ARP Bolts told me. “A bolt is essentially a spring. As they tighten they stretch ever so slightly which locks them in place with just a bit of spring tension.”
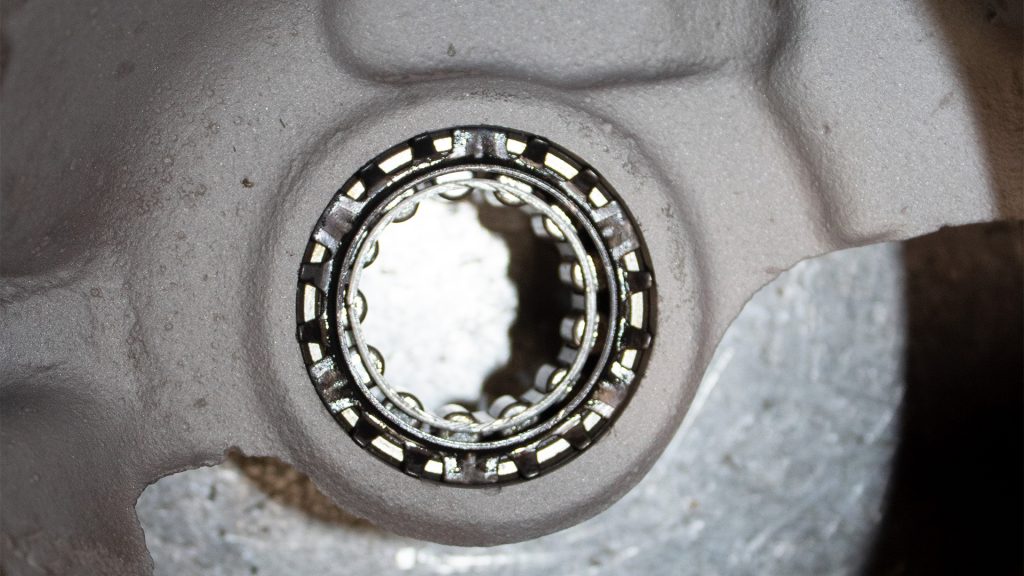
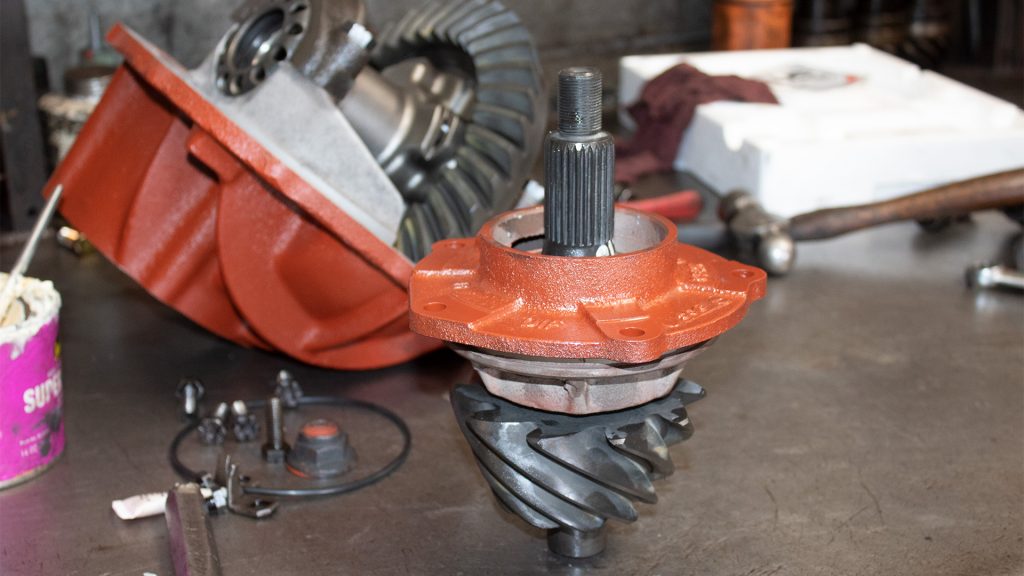
Next up is the Pinion straddle mount Bearing into the main gear case, then installing the differential unit to the case. Next up he installs the adjuster nuts taking care that the threads are lined up correctly. Using a spanner wrench, he sets the adjuster at about hand tight until the bearing caps are installed.

Now onto the pinion. John sets the pinion preload with a solid spacer and starts the tedious process of installing the solid shims. It took 6 tries to get the shims just right were the gear moves freely and does not rattle. Each rear end is different when you have new parts from different manufacturers or if you are re-installing a used rear end, there may be some wear issues. So, take your time and get it right this will safeguard you from ruining the rear end. After the preload is set he installs the pinion seal.
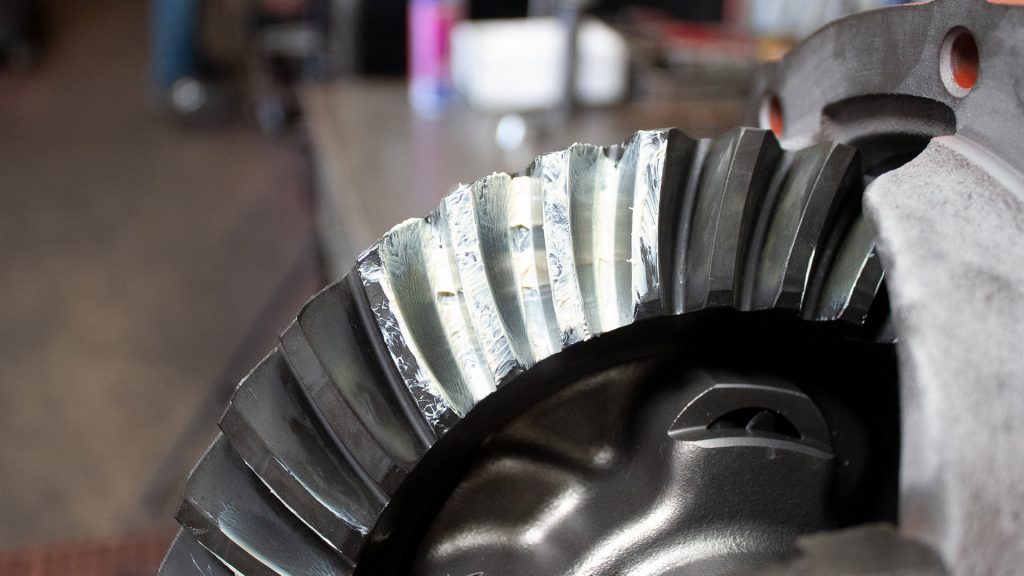
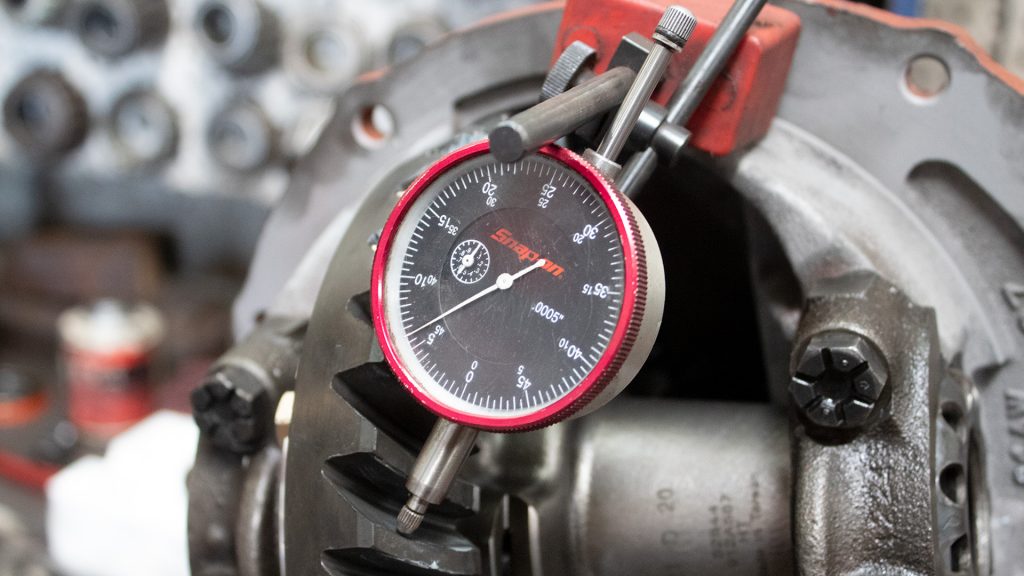
We are almost there as John seats the yoke onto the pinion shaft. Now the ring assembly and case go on the vice to hold it in place while installing the pinion assembly. This is where it get’s a bit technical too, torquing down the bearing caps, and adjuster nuts with a spanner wrench to get just the right fit and “lash” of the gears. With a bit of gear marking compound, we look for “twinning” where the pinion gear meets the ring gear in the middle of the teeth. This is done by those pinion adjusting shims and the spanner adjusting nuts on the outsides of the ring gear/diff assembly. A quick check of the ring gear backlash and it is precise at .006 inch which falls in line with the U.S. Gear’s recommendations for this competition set of gears. When all is good, install the adjuster keepers. John’s attention to detail with the pinion shims pays off as the lash looks good and no need to disassemble to adjust the pinion. Double check everything is tight.
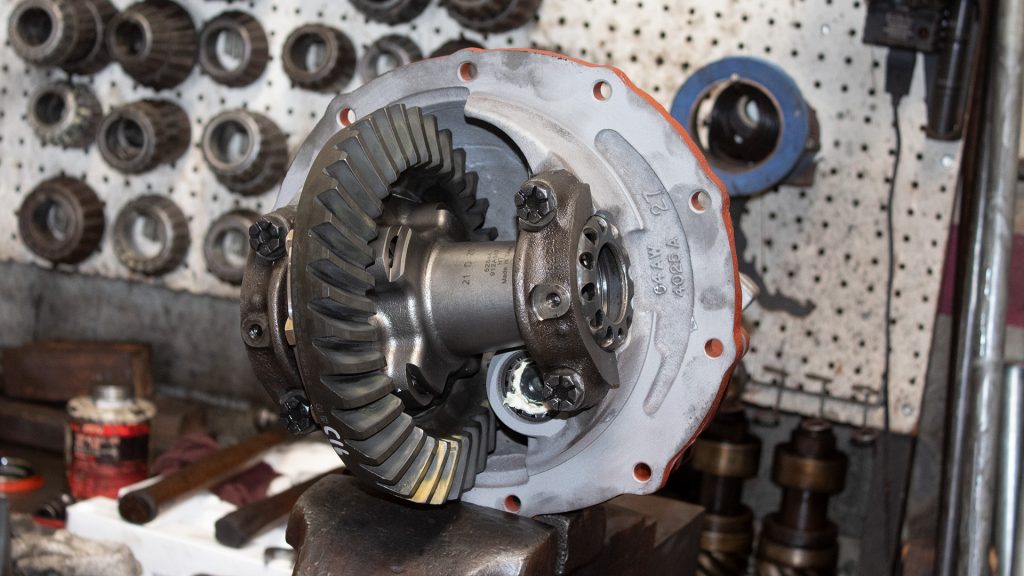
There we have it, the expertly installed third member gear set at J&S Gears with brand new Ring/Pinion gear set 35/10 or 3.50:1 U.S. Gears and Eaton Detroit TrueTrac. Stay tuned for Part Three as we install the member into the car and get it back down on the blacktop where it belongs for some break in time.


